Harvesting and Storage Tips

Let me tell you about my first attempt at harvesting radishes – it was a bit of a disaster! I waited way too long, thinking bigger would be better, and ended up with some pretty woody, split vegetables. But after years of growing these crispy little gems, I’ve learned exactly when and how to harvest them for the best results.
When to Harvest Your Radishes
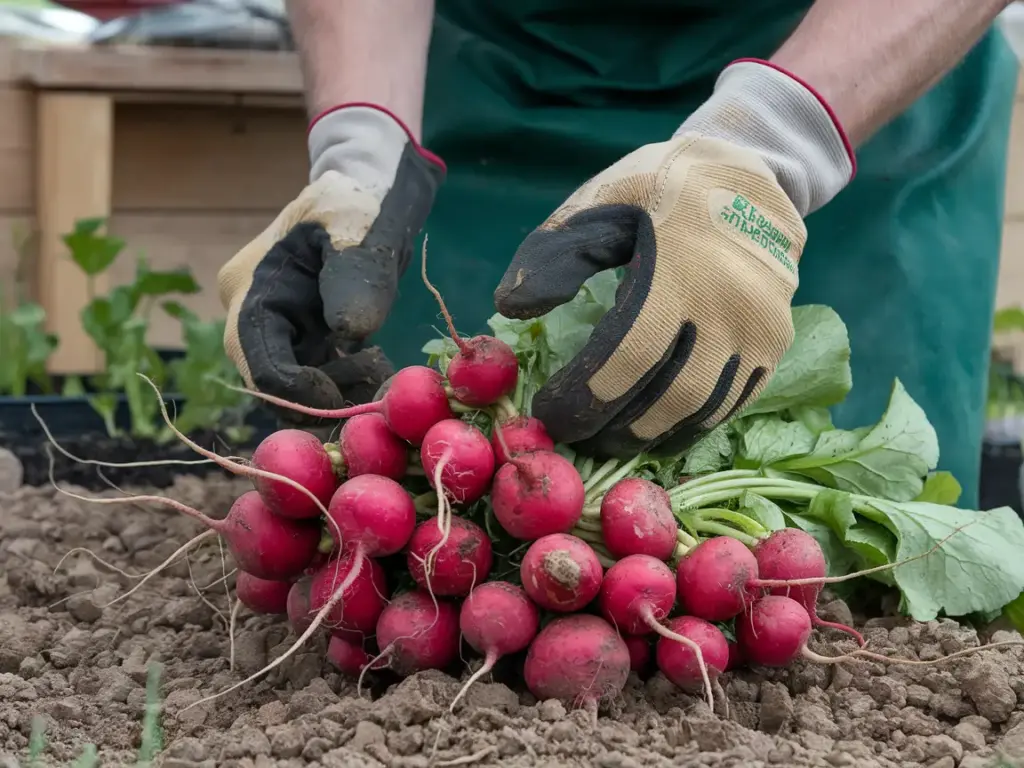
The secret to perfect radishes is checking them at exactly the right time. Most varieties are ready to harvest between 21-30 days after planting, but here’s my foolproof method: when the roots are about an inch in diameter (roughly the size of a quarter), they’re good to go! I always do a little test by gently brushing away the soil around one radish to check its size.
One thing I learned the hard way – don’t wait until they get too big! If you leave them in the ground too long, they’ll get super spicy and develop a weird, spongy texture. Trust me, nobody wants that!
Proper Harvesting Technique
Here’s the technique I’ve perfected over the years:
- Water your container the day before harvest – this makes pulling so much easier
- Gently grasp the radish greens close to the soil level
- Wiggle while pulling upward with steady pressure
- If they’re being stubborn, use your other hand to loosen the soil around the radish
I used to just yank them out (rookie mistake!), but that often damaged both the radish and surrounding plants. A gentle touch makes all the difference.
Storage Solutions That Actually Work
After harvesting literally hundreds of radishes, I’ve figured out the best storage method. First things first – don’t wash them right away! Here’s my tried-and-true process:
- Cut off the greens, leaving about 1/2 inch of stems
- Brush off excess soil (don’t wash!)
- Place them in a perforated plastic bag with a slightly damp paper towel
- Store in the crisper drawer of your fridge
Using this method, I’ve kept radishes crisp and fresh for up to two weeks. The key is maintaining the right humidity without letting them get too wet.
Don’t Toss Those Greens!
Here’s something most people don’t know – radish greens are totally edible and super nutritious! I actually love using them in my cooking. They make an amazing pesto (way cheaper than basil!), and they’re perfect in stir-fries. Just make sure to wash them thoroughly, as they can be a bit sandy.
My favorite quick recipe is to sauté them with garlic and olive oil for about 3 minutes. Add a pinch of red pepper flakes, and you’ve got a delicious side dish that most people throw away!
Common Harvesting Mistakes to Avoid
Over the years, I’ve made pretty much every mistake possible. Here are the big ones to watch out for:
- Waiting too long to harvest (they get pithy and gross)
- Pulling too hard and breaking the tops off
- Not labeling planting dates (crucial for timing!)
- Forgetting to check the size regularly
- Washing before storage (leads to early spoilage)
Remember, radishes are one of those vegetables where timing is everything. I keep a little garden journal now to track planting dates, which has made a huge difference in my harvest success rate.
The best part about growing radishes is that even if you mess up one batch, you can start over and have new ones ready in less than a month. They’re super forgiving that way, which is why I always recommend them to my beginner gardener friends!
Conclusion
Growing radishes in containers is a fantastic way to start your gardening journey! With just a few basic supplies and about 3 weeks of patience, you’ll be enjoying fresh, crispy radishes right from your own container garden. Remember to keep the soil consistently moist, provide adequate sunlight, and harvest your radishes as soon as they reach maturity. Ready to get started? Grab those seeds and containers – your homegrown radish adventure awaits! Don’t forget to share your success stories and join our gardening community for more tips and tricks.


GIPHY App Key not set. Please check settings